A flat tyre rarely happens at a convenient time, as UK drivers experience an average of 41 punctures, blowouts, and flat tyres every hour. Almost 360,000 drivers faced a flat tyre, which means right now, someone else is dealing with exactly what you are.
An emergency tyre puncture repair kit gives you a way to get moving again for small tread punctures without waiting for recovery. Injecting the sealant, inflating the tyre, and driving carefully to a professional takes around ten minutes when done correctly.
When the damage is too large, located on the sidewall, or unsuitable for a repair kit, professional assistance may be the safest option. If a puncture repair kit cannot safely restore mobility, a mobile tyre fitting service can assess the damage and recommend the most appropriate solution.
What is in an Emergency Tyre Puncture Repair Kit?
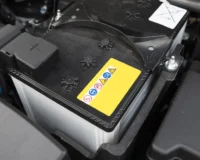
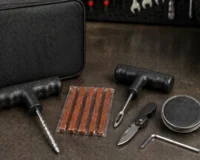
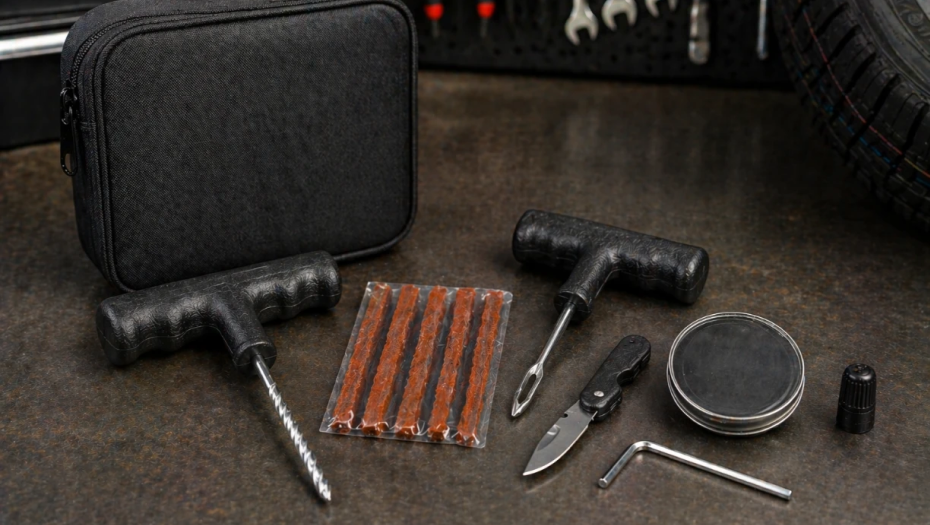
An emergency tyre puncture repair kit contains two main components that work together to seal and reinflate a punctured tyre. Most modern cars without a spare wheel carry one in the boot, either in a side panel or under the boot floor. If you have never checked your repair kit, it is worth confirming that it is present and that the sealant is still within its expiry date.
What the Kit Contains
- Sealant bottle: A liquid latex compound injected through the valve stem to seal the puncture from the inside
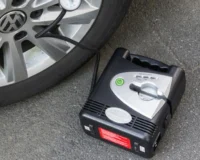
- Compressor or inflator unit: Plugs into the 12V socket to reinflate the tyre after the sealant is injected
- Valve cap tool: Used to remove the dust cap and attach the sealant nozzle securely
- Speed warning sticker: Attached to the steering wheel after use as a reminder not to exceed 50mph
- Instructions leaflet: Kit-specific steps that may vary slightly from the general process below
Checking the Kit Before You Need It
Sealant kits carry an expiry date printed on the bottle. Expired sealant may not seal effectively, leaving you stranded when you most need it to work. Check the date every six months and replace the bottle if it has passed.
Before You Start: Safety First
Getting the repair right starts before the kit is even opened. Pulling over to a safe position and making yourself visible to other traffic matters more than anything else at this stage. Personal safety should always take priority over attempting a quick repair.
Pull Over and Make Yourself Safe
- Hazard lights on immediately: Switch them on as soon as you suspect a puncture, before you even pull over
- Pull as far left as possible: Get the car fully off the carriageway onto the verge or into a layby.
- Engine off, handbrake on: Secure the vehicle before leaving the driver’s seat
- High-visibility vest on: Put it on before stepping outside, not after
- Warning triangle placed behind the vehicle: At least 45 metres back on a single carriageway, further on faster roads
- Stay away from passing traffic: Work from the pavement or verge side of the vehicle at all times
Did You Know?
Many modern cars come with a tyre pressure monitoring system that alerts you to a pressure drop before the tyre fully deflates. If a warning light appears on your dashboard, pull over calmly and inspect the tyres before continuing, as even a slow puncture can deteriorate quickly at speed.
How to Use an Emergency Tyre Puncture Repair Kit Step by Step
With the car safely stopped and hazards on, work through these steps in order. The sealant must enter the tyre before the compressor inflates it, so the sequence matters. Reversing the order significantly reduces the kit’s effectiveness.
Step 1: Locate the Puncture and Assess the Damage
Look at the tyre carefully before opening the kit. A nail, screw, or piece of glass visible in the tread area is the best-case scenario for kit use. Sidewall damage, a large tear, or a tyre driven on while flat are all situations where the kit is unlikely to help. Assessing the damage first prevents wasting time on a repair the kit cannot complete.
Step 2: Position the Tyre Correctly
Rotate the wheel by hand so the puncture sits at the top of the tyre. Some repair kits recommend positioning the valve stem in a specific location before injecting the sealant. Always follow the manufacturer’s instructions. If you cannot identify the exact puncture point, position the valve at the top as a starting point.
Step 3: Do Not Remove the Embedded Object
If a nail, screw, or other object is still in the tyre, leave it in place. Removing it allows air to escape faster and reduces the sealant’s ability to form a seal. The kit is designed to work with the object still embedded, sealing around it from the inside rather than plugging the gap it leaves behind.
Step 4: Remove the Valve Cap and Attach the Sealant
Unscrew the dust cap from the tyre valve and keep it somewhere you will not lose it. Attach the nozzle of the sealant bottle directly to the valve stem, following the connection method shown on your specific kit. Some kits screw directly onto the valve, whilst others use a push-fit connector.
Step 5: Inject the Full Contents of the Sealant Bottle
Empty the entire contents of the sealant bottle into the tyre without stopping halfway. The sealant needs sufficient volume to coat the interior and reach the puncture point. Wear gloves if your kit includes them, as the liquid is corrosive and difficult to remove from skin and clothing.
Step 6: Attach the Compressor and Inflate the Tyre
Once the sealant bottle is empty, connect the compressor hose to the tyre valve. Plug the compressor into the vehicle’s 12V socket, start the engine, and switch the compressor on. Inflate the tyre to the pressure recommended in your vehicle handbook or shown on the label inside the driver’s door frame.
Step 7: Check the Pressure and Roll Forward if Needed
Monitor the compressor gauge as the tyre inflates. If the tyre is not reaching the correct pressure, roll the car forward slowly by a metre or two to distribute the sealant around the inside of the tyre. Return to the compressor and check the pressure again before proceeding.
Step 8: Attach the Speed Warning Sticker and Drive Carefully
Your kit includes a sticker as a reminder to keep to 50mph maximum. Attach it to the steering wheel where you can see it while driving. The sealant needs this time at a controlled speed to distribute properly and form a reliable temporary seal before you reach a professional.
The kit gets you moving, but the tyre still needs a proper inspection before you drive normally again. Mobile Tyre Local can come to your home or workplace the same day to inspect the treated tyre, remove the sealant, and carry out a permanent patch or plug repair where viable. Calling ahead means the fitter arrives already knowing what to expect.
What to Do After Using the Kit
The sealant is a temporary measure, and the tyre needs professional attention as soon as possible. Puncture repair foam provides a quick fix for minor punctures and allows you to safely drive at up to 50mph for a limited distance, but once used, the tyre should be replaced or professionally inspected as soon as possible, as the foam is corrosive to the tyre interior over time.
After Using the Kit: What You Must Do
- Drive at 50mph maximum: This limit applies until the tyre has been professionally inspected, not just until you reach a garage.
- Drive no further than 50 to 100 miles: Sealant repairs are rated for short distances only.
- Visit a professional fitter immediately: The sealant degrades the tyre interior if left in place too long.
- Tell the fitter the sealant was used: A tyre treated with sealant requires specific handling during inspection and replacement.
- Replace the kit after use: A used sealant bottle cannot be refilled, and the kit needs replacing before your next journey.
Quick Tip:
Write the date of use on the tyre sidewall with chalk or a marker before visiting the fitter. This helps the technician identify which tyre was treated and plan the assessment before they even begin.
When the Kit Will Not Work
A puncture repair kit is designed for small punctures in the tread area and nothing else. Attempting to use it on the wrong type of damage wastes time that is better spent calling for help. If the tyre has a hole larger than 4mm in diameter, the kit is unlikely to work, and if the rim of the wheel is damaged, no tyre repair addresses that at all.
Situations Where the Kit Will Not Help
- Sidewall damage: The sidewall flexes constantly while driving and cannot be safely sealed by sealant, a plug, or a patch. No professional fitter will attempt a sidewall repair, and replacement is the only safe option.
- Hole larger than 4 to 6mm: Sealant cannot bridge a gap this size, and the tyre will continue to deflate.
- Tyre driven on while flat: The internal structure is likely compromised, and the sealant will not restore integrity.
- Rim damage: A bent or cracked rim cannot be driven on safely, regardless of tyre condition.
- Multiple punctures: The kit contains enough sealant for one puncture on one tyre only.
- Run-flat tyres: Some run-flat tyres are incompatible with sealant kits. Check your vehicle handbook before using the kit on a run-flat.
When the damage is beyond what the kit can handle, every minute spent attempting a repair that will not work is a minute a mobile fitter could have spent getting to you. Mobile Tyre Local carries patch repair, plug repair, and full tyre replacement equipment in every van, reaching the roadside 24 hours a day, 7 days a week.
Do not wait for the tyre to fail before making that call.
How Long Does an Emergency Tyre Repair Last?
A sealant repair is not a permanent fix under any circumstances. It gets you to a professional fitter, not past the need for one. Understanding the limits helps you make safe decisions about how far and how fast to drive after the kit has been used.
What the Temporary Repair Covers
Factor | Sealant Kit Limit |
Maximum speed after use | 50mph |
Maximum distance after use | 50 to 100 miles |
Time before professional inspection | As soon as possible, within 24 hours |
The hole size the kit can seal | Up to 4 to 6mm in the tread area only |
Number of uses per bottle | One use only |
Tyre condition after sealant | Replacement usually required |
Can the Tyre Be Repaired After Using Sealant?
Sometimes. A professional fitter will clean the sealant from the interior and assess whether a permanent patch or plug repair is viable. In many cases, the tyre still needs replacing, partly because the sealant degrades the rubber over time and partly because the original puncture may be larger than it appeared from the outside. Always tell the technician that sealant was used when handing the vehicle over.
FAQs
Can I use an emergency tyre repair kit on a sidewall puncture?
No. Sealant, a plug, or a patch under any circumstances cannot repair sidewall damage. The sidewall flexes constantly while driving, and no repair holds reliably in this area. Skip the kit entirely if the damage is on the sidewall and call a mobile fitter or recovery service immediately.
How long does the sealant last in the tyre?
The sealant is designed to last long enough to drive to a professional fitter, typically 50 to 100 miles at a maximum of 50mph. Beyond this distance, the sealant begins to degrade the tyre interior, and the temporary seal may fail without warning.
Do I remove the nail or screw before using the kit?
No, leave the object in the tyre. Removing it allows air to escape faster and reduces the sealant’s ability to form a seal. The kit works with the object still embedded, injecting sealant around it from the inside.
What if the tyre does not inflate after injecting the sealant?
Roll the car forward by one to two metres to distribute the sealant around the inside of the tyre, then try the compressor again. If the tyre still will not reach the correct pressure, the damage is likely too large for the kit to seal, and professional assistance is the next step.
Can I reuse the sealant kit after a puncture?
No. Each kit contains enough sealant for a single use on a single tyre. Once the bottle is empty, it needs replacing before your next journey. The compressor unit is reusable, and only the sealant bottle requires replacement.
Will the kit work on a run-flat tyre?
Not always. Some run-flat tyres are incompatible with sealant kits, and using one may affect the tyre’s properties. Check your vehicle handbook before attempting to use the kit on a run-flat.
Takeaway
A puncture at the roadside is stressful, but it does not have to mean a long wait or an unsafe drive on a failing tyre. Use the kit if the damage is small and in the tread, drive carefully to the nearest fitter, and get the tyre properly inspected before the sealant has a chance to do further damage. If the kit does not work, if the damage is on the sidewall, or if you simply want a professional to handle it from the start, one call is all it takes.
Mobile Tyre Local operates 24 hours a day, 7 days a week, reaching customers at the roadside, at home, and at work across the area with no call-out charge. Rated 4.8 stars by customers, the service covers patch repair, plug repair, spare wheel fitting, and full tyre replacement at competitive prices.
Visit tyre-fitting.co.uk or call 07731 306 351 now, and a fitter will be on the way.